
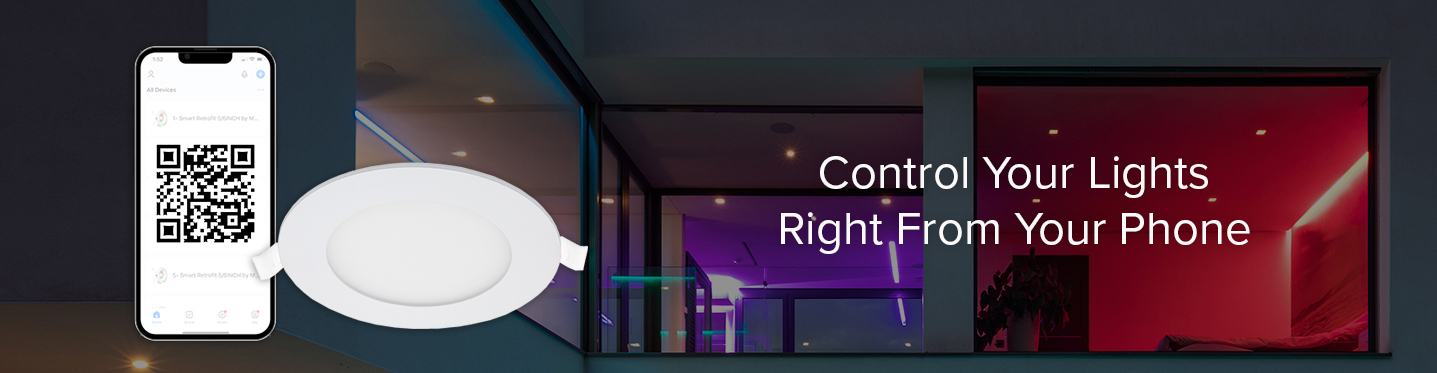
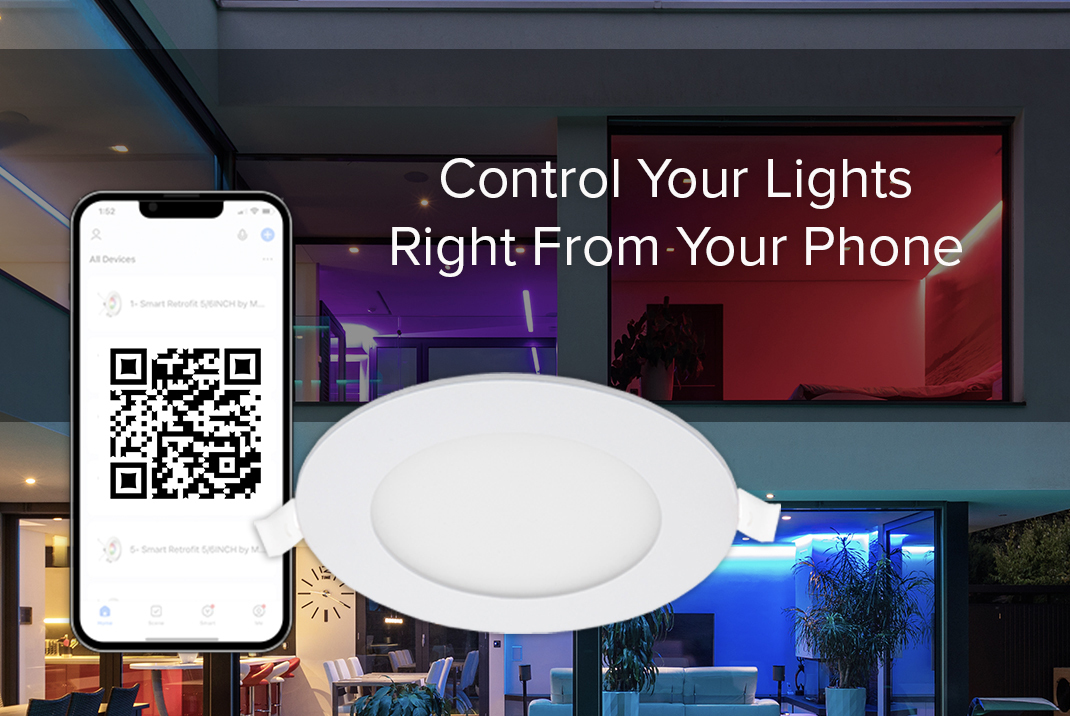
Once your WiFi lights are installed and paired with your phone using the Smart Life app, you can start using all of the amazing features to control your lights and customize your home. You can dim and brighten them, change colors, or use preset themes to create a unique ambiance in the room. You can also set up schedules and groups to control multiple lights together.
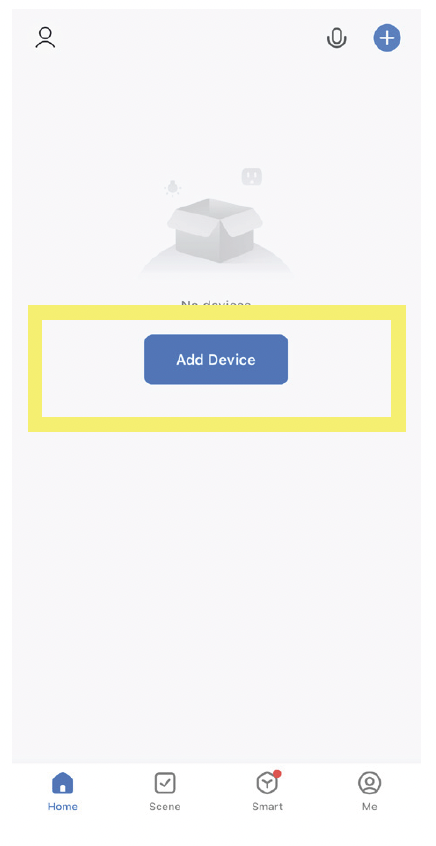
Step 1.
Click “Add Device”, or click the
blue + in the top right corner.
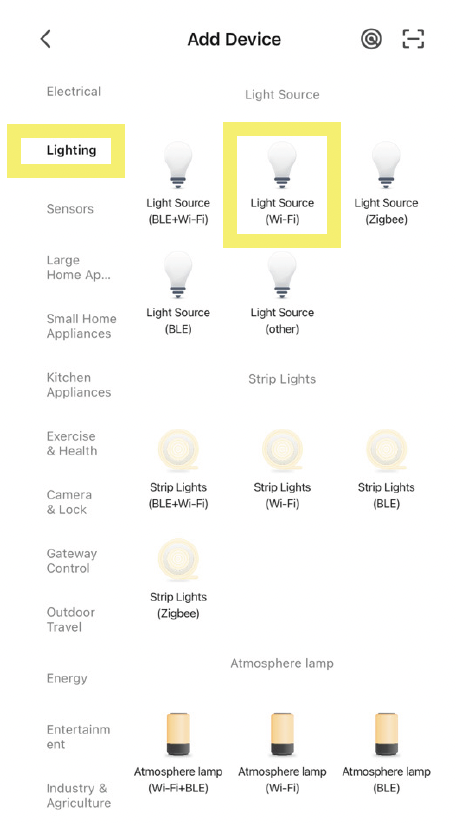
Step 2.
Click Lighting in the categories on the left side, then click the second light bulb labeled “Light Source (Wi-Fi).”
Step 3.
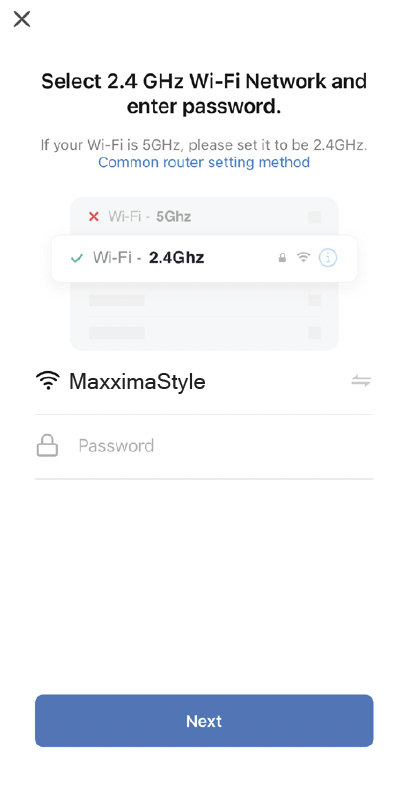
Select your WiFi network
and enter your password.
Step 4.
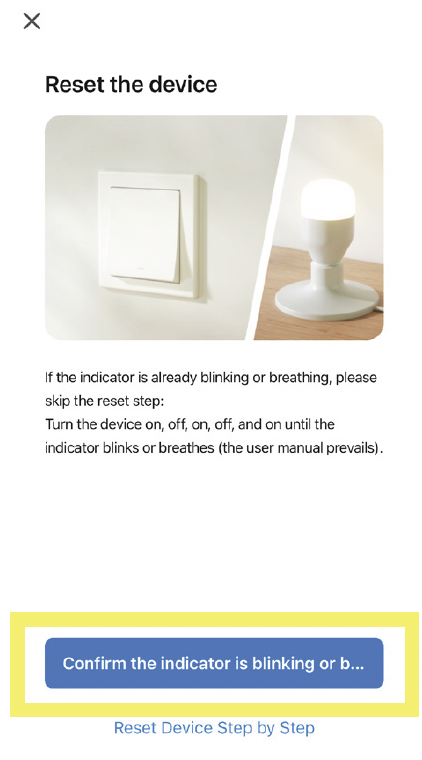
Starting from the on position, turn the device OFF-ON-OFF-ON-OFF-ON until the indicator is blinking. Then click the blue button to confirm the indicator is blinking.
Step 5.
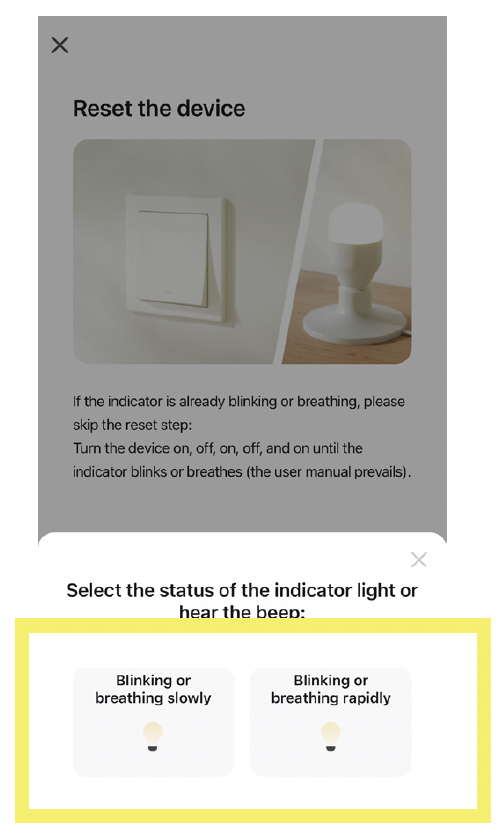
Select whether your device
is blinking slowly or rapidly.
Step 6.
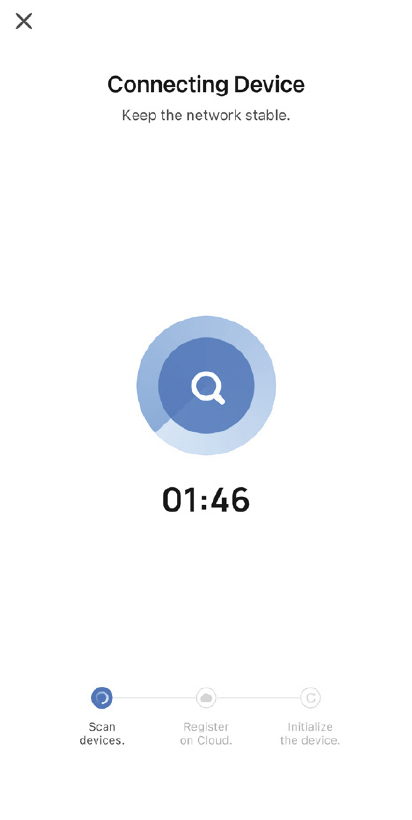
Now your app will attempt to pair with your device(s). If it is unable to pair within 2 minutes, it will time out. If that happens, try our troubleshooting guide
Step 7.
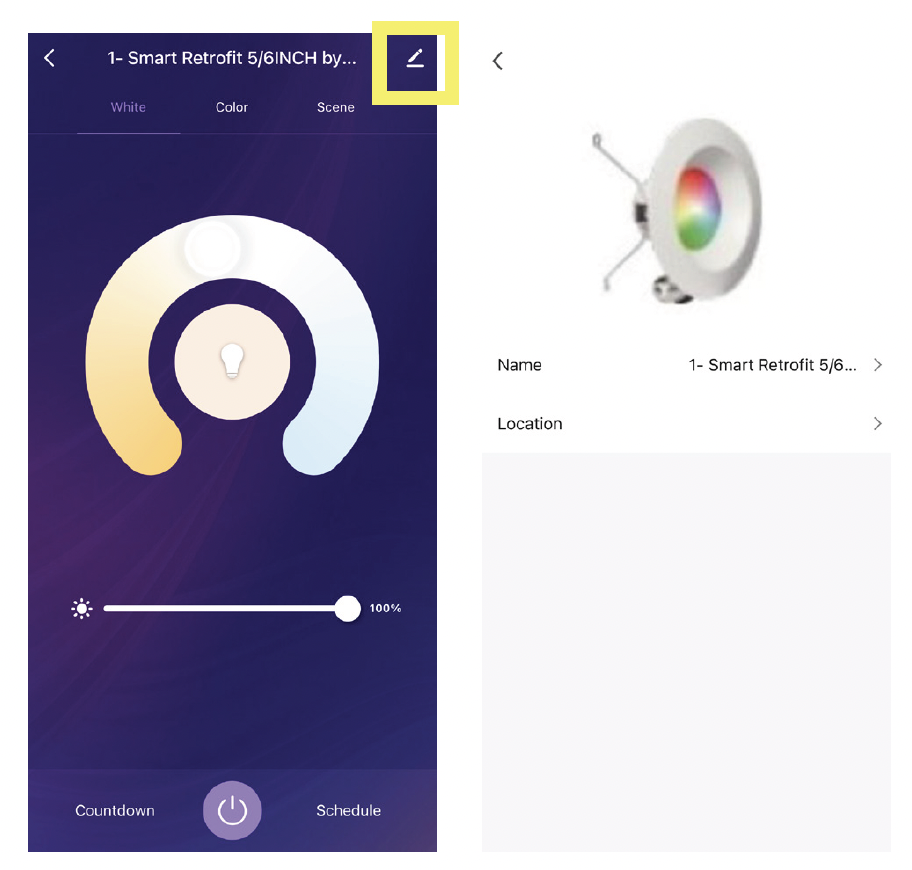
To name your device, click into the device you want to name then click the pencil in the top right corner. This makes it easy to to control specific lights and group your devices.
Step 8.
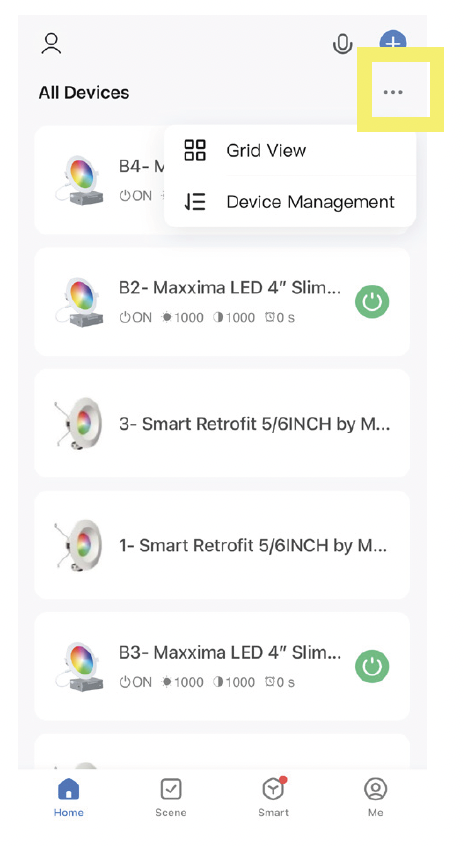
You can re-arrange the order of the devices in your list by clicking the three dots in the top right corner, then “Device Management.”
Share your Devices
You can easily send a link to family and guests to allow them to control the brightness and settings without going through the setup process. To share all the devices in your account with someone else, follow the steps below.
• Go to “Me” at the bottom of the App
• Select “Home Management”
• Select the Home you wish to share with others
• Select “Add Member”.
You can send the invite via your Smart Life account, message, or email. New members must have or create a Smart Life account via the Smart Life App.
Scheduling Your Lights
Program your lights to adjust automatically based on your schedule.